Using multiple domains with a multi-site in Statamic 3
This article is over 12 months old, and may be out of date or no longer relevant.
But you're here anyway, so give it a read see if it still applies to you.
Statamic’s Pro version comes with multi-site functionality baked-in. And after having seen other CMS platforms struggle with the complexities, am a little blown away how easy it is. With the exception of a few little “gotcha” moments.
The most common use case for a multi-site setup would be for multiple languages – and Statamic makes it possible to do this via a specific path on your domain, a subdomain, or an entirely different TLD.
Which got me thinking…
I just launched the new Western Wellness website and they have two other domains that are used for location-specific landing pages with location-based content, and all links then go back to their main site. In the old setup, these were literally a static HTML page with hand-coded content. But with Statamic and its multi-site capabilities at the TLD level, I thought I’d have a look to see whether it would be possible to have these static landing pages editable within the Statamic CMS.
Turns out, yes, it is entirely possible.
Along the way, I had a few little issues to overcome, and it helps to RTFM. So go and do that if you get stuck. To help you out as a starting point, here’s Statamic’s Multi-Site documentation.
This article assumes you have some knowledge of working with Statamic 3 and Laravel’s environment and configuration setup. Some scenarios here are very specific to my setup and this project – but hopefully some pointers and ideas that may be useful for you too.
Converting to multi-site
This part is really easy. All you have to do is say please.
1php please multisiteDon’t forget to say thank you too. Do it, out loud. You’ll feel better for doing it, trust me.
This command will go through your existing single-site setup and reconfigure all of your site content for the sites you define as the command runs (don’t worry, you can rename and reconfigure them later too).
I also needed to forcibly clear the cache – apparently multisite should do this, but I needed a manual kick:
1php artisan cache:clearIt’s time to check out the sites.php configuration file.
Site configuration
The sites you have created in the multisite command are now listed in the sites configuration. Statamic recommend that the URL for each be set to an absolute URL, so this can easily be done by:
1. Adding the APP_URL env variable
2. Adding new env variables for the other domains, and referring to them
1'sites' => [ 2 3 'default' => [ 4 'name' => config('app.name'), 5 'locale' => 'en_US', 6 'url' => env('APP_URL'), 7 ], 8 9 'landinghandle' => [10 'name' => 'Landing Page Example',11 'locale' => 'en_US',12 'url' => env('APP_LANDING_URL'),13 ],14 15 /* ... */16 17],The “landinghandle” is the handle you give it during the multisite setup process – and each new site version you create will have its own configuration.
In your site’s .env file, ensure you create new these new variables for each site’s absolute TLD.
Within the Statamic control panel, you should now see the sites dropdown in the top-right.
Local configuration
This is a bit up to you… whether you’re using something like Valet or MAMP Pro (or something else), update your configuration however you need to.
The key point is that each local domain you set up should point to the same public folder within your site.
As simple as that, yep.
Check your content
Now’s a great time to tweak the configuration and existing content of your site, including Collection settings (how Collections operate for each site), plus reviewing content visibility across the different sites.
That last part will lead us in to the next section, and may be just a specific use case for this site, but hear me out.
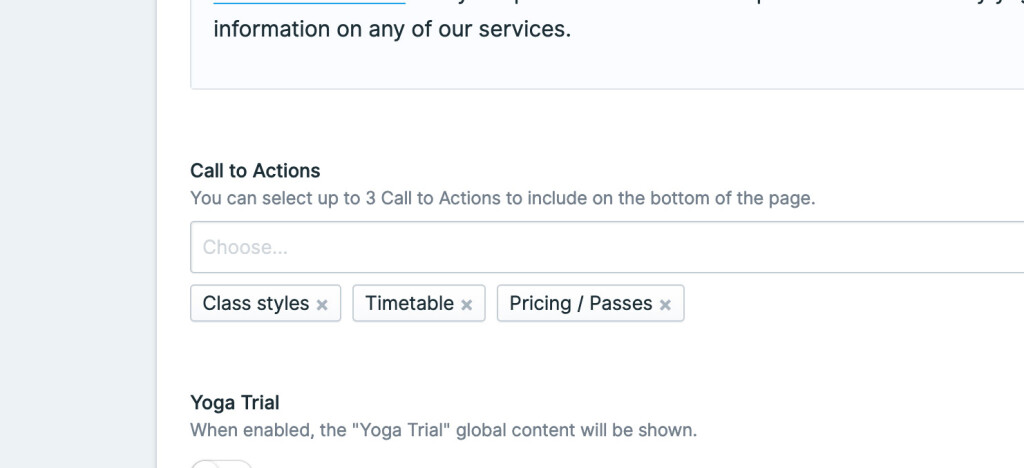
I have a Collection of small blocks of content that can get injected in to other pages - the Call to Actions that appear at the bottom of the site. A heading, some text and some link buttons. These are stored in a separate Collection, and in my Pages Blueprint, allow the author to select from the Call to Actions collection to include the blocks they want at a per-page level.
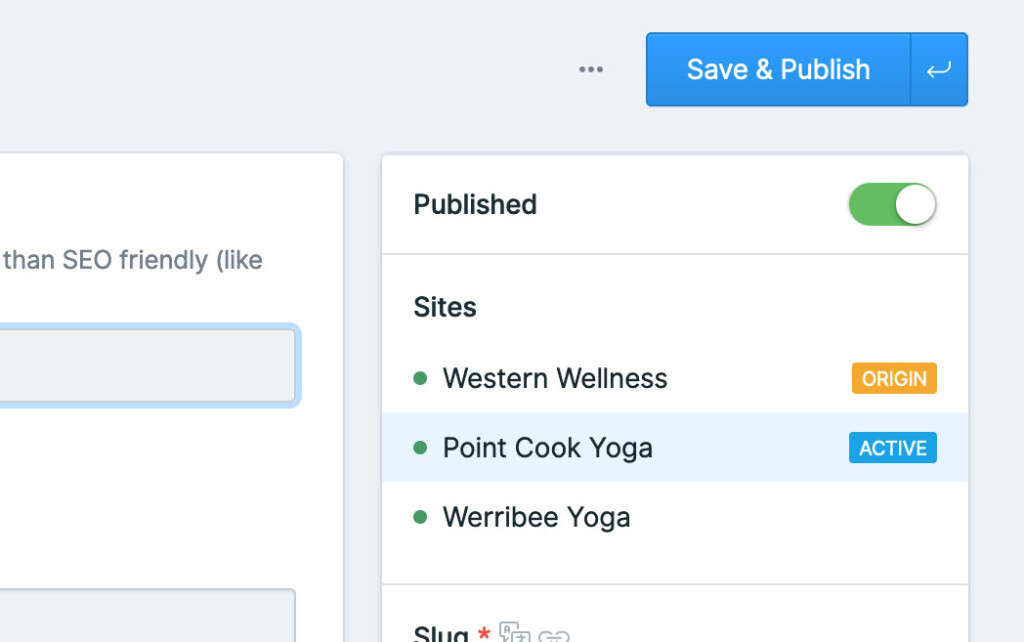
On the right of the Page editor you can see all of your Sites listed – and by default, your existing content will just be visible in your default site.
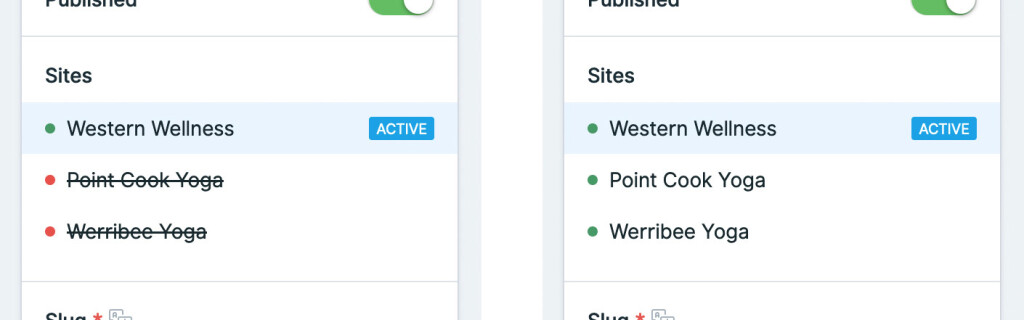
But for these Call to Action blocks, I want them to be selectable from within other sites – so it is as simple as enabling for each Site and saving. Statamic behind the scenes creates these for the other sites, and uses an Origin key in the md file to point back to the default content – I don’t need these editable per site – just the default site is fine. If you flick to one of the other sites and go to edit the Call to Action for that site, it is all disabled, and the Sites list is telling you the Origin version – and simply clicking that will take you to the Origin version to edit. Eeeeeasy!
This part is really important for when we want to link to a “default” Call to Action from another “site” in our setup.
Create your content
So now we need to actually create the landing home page. This is as easy as flicking to one of the other Sites (top-right Sites menu, remember), and going to your Pages Collection, and creating a new Entry. Call it “home” and away you go.
Too easy.
Now remember above, I mentioned I gave authors the ability to include options from the Call to Actions Collection? Because we went through the existing Call to Actions and activated them for each Site, they now appear in the site-specific Entry editor field.
This means that they are part of the default site, but can still be included on my other sites.
It gets even fancier though – when you activate specific Entries for specific Sites, this means that you could have some Entries for Site A and others for Site B – so you can really tailor and customise what authors see when working within different sites. How flippin’ neat!
OK so this all makes sense… but for me, the Call to Actions include Links – and these Links are part of the default site. When I go to visit the domain of a non-default site, none of the links work. Crud, OK, what have I missed? (PS: I didn’t RTFM fully). So let’s fix this up.
Entries in other sites in Antlers
When you try to access an Entry in a site, it looks at the site that it is currently on. On the default site, it only sees Entries on the default site. On Site A, only Site A entries, Site B, only Site B entries.
For this site, there is also a Global that contains all of the content for the “trial” section at the bottom – content, asset, and also an Entry reference to the link button.
But when looking on Site A, the Entry button was linking to Site A’s home page. This is because Statamic is assuming the Entry is part of the same site – which for many use cases, it would or should be – but it is trying to find the Entry from the Global but it simply doesn’t exist in that site setup. In this instance, I just want Site A to have a landing page, and all other links go back to the main default site.
I tried get_content but no luck – it still just returned Site A’s home page. Again, time to RTFM and you’ll find answers. Hoorah! Check out the get_content tag docs for more.
When using get_content you can also set add a site or locale param – basically telling get_content to look at the specific site you’re telling it to, not the site it is currently on. Tweaking my Call to Action and Trial Link logic, and using get_content with a site means that I am now able to get the default site content URL from within another one of the sites. Go team, go!
Given the Global and Call to Action have an Entry fieldtype, I needed to make sure that I passed the from parameter as the raw representation – i.e. the content ID – not the augmented version.
1{{ get_content :from="destination | raw" site="default" }}2 <a href="{{ url }}">Link text label</a>3{{ /get_content }}One other consideration: I also needed to add a ‘base’ tag to my <head> because all links will are relative – meaning that otherwise they will try to the current site’s root domain – and in this case, I do actually want them to go back to the main default site for any other links:
1<base href="{{ config:app:url }}">Static Caching and Multi-Site
Static Caching in Statamic is absolutely awesome, and helps make your site so speedily efficient. please commands, invalidation rules and deployment steps also make it easy to clear the cache when making changes too – so it’s super friendly for non-tech authors too.
However, when publishing, either of the non-default domains just loaded the default site. What the heck is going on? It’s another great example of “well, did you RTFM?”. Apparently I didn’t read enough, so I did some more reading, and problem solved.
It’s actually really easy: as well as your sites.php configuration, you also need to update your static_caching.php file paths to be unique per site.
1'strategies' => [ 2 3 /* ... */ 4 5 'full' => [ 6 'driver' => 'file', 7 'path' => [ 8 'default' => 'public-path-to-default-cache', 9 'landinghandle' => 'public-path-to-landinghandle-cache',10 ],11 'lock_hold_length' => 0,12 ],13 14],If you miss this step, what happens is that the first domain that gets accessed – be that the default site or Site A or Site B – will have its Entry rendered and stored. When you access any other domain, the server configuration will see that a file has been cached and simply serve that – regardless of what domain is being used.
Updating the paths and re-publishing, and now in the static folder, there are separate caches for each site – meaning all domains are statically cached, but now actually separated by the site and Statamic knows what to do under the hood.
Check it out in the Statamic Static Caching documentation – right down the bottom under “Multiple Sites”.
Deployment on Laravel Forge
I do really love using Forge for deploying any of the Laravel (and Statamic) sites that Mity Digital build. And getting a multi-site Statamic site up and running in Laravel Forge when using multiple domains is trivially easy.
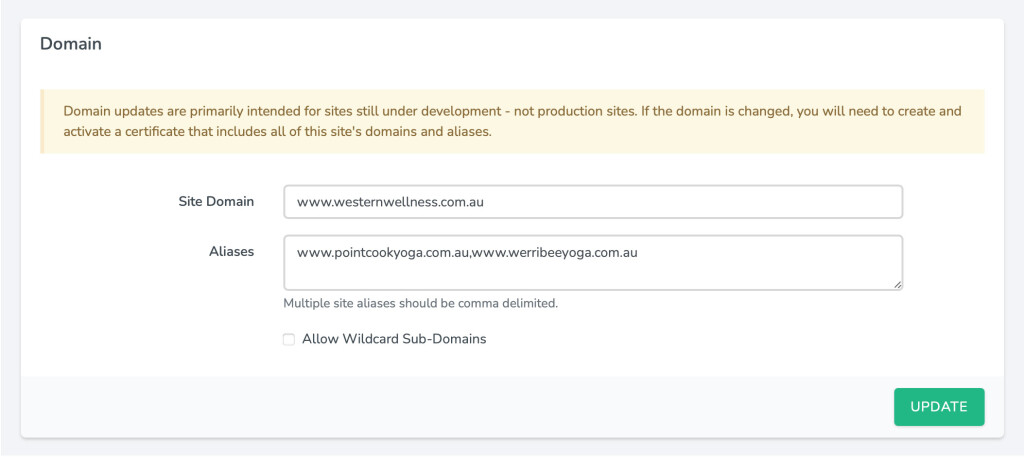
First of all, configure your Site’s Meta to add the other domains needed for your site. Obviously you’ll have your primary already set, and then additional domains as Aliases.
Up next, get your SSL set up. Because every site should be on SSL these days. Do this.
And simply deploy your site – remembering to add the site URLs to your .env file that you set earlier.
If it’s a new site, don’t forget to update your Nginx configuration with the necessary static caching rewrite rules plus any deployment-stage cache clearing steps.
This setup is essentially mimicking your local configuration too – you have multiple domains all pointing to the one app. Statamic then knows exactly what to do to serve each domain – and if using Static Caching, knows how to cache and serve the different site content.
The flexibility and power of a multi-site setup in Statamic 3 is incredible – and this has been a great use case example of how to have content-editable landing pages, but also share and link to content between different sites. So very very cool – and hopefully my experience (and then writing this post) has been helpful to you and your multi-site setup too.