Adding watermarks to images in Statamic 3
This article is over 12 months old, and may be out of date or no longer relevant.
But you're here anyway, so give it a read see if it still applies to you.
I have re-built my landscape photography website in Statamic 3 - a lot has changed over the years, not only with my approach and style to photography, but also with technology and the web.
Quick backstory here: putting your photography online is a balancing act: you want to show it off well with a high quality image, but also not make it too good that people just print it off themselves. Sure, I’d never accept a print of that quality, but some don’t care. This got me thinking: is there a way I can programatically (and effortlessly) apply watermarks to my images? Turns out, there is! After all, worst case, I could just export for the web with my watermark in place - but if I can get a helping hand for consistent placement, I’ll take it.
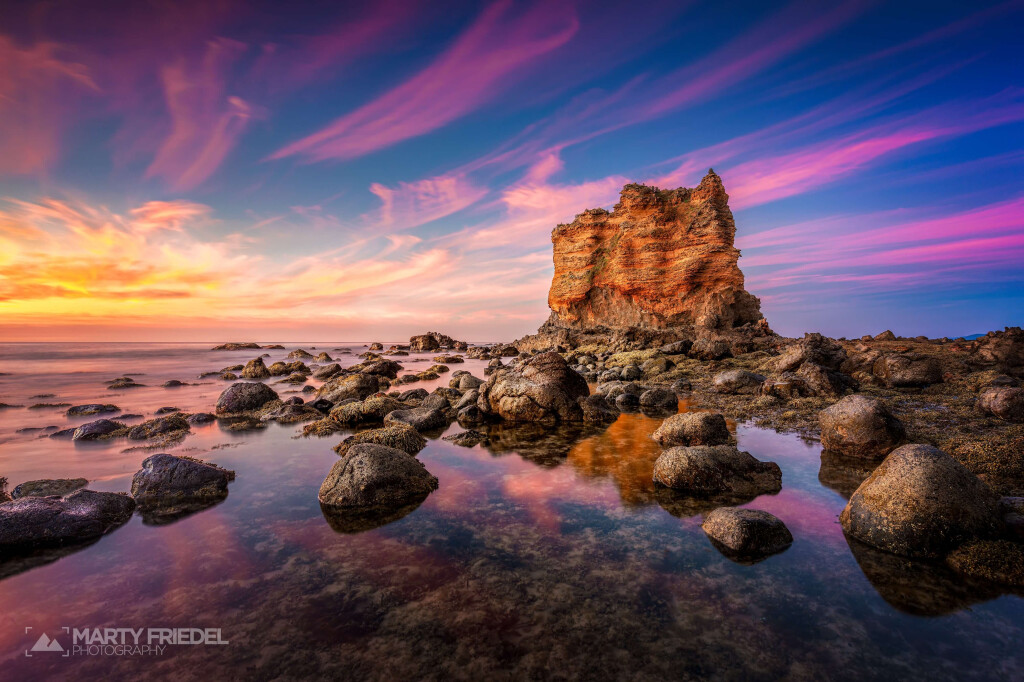
So just a heads up, the photography in this blog post is some of my work, and the watermark is my logo that I like to place on images before sharing online. If you want to see more, check out www.martyfriedelphotography.com.au.
Statamic 3.3.8 (released April 20, 2022) now includes native support for watermarking with Glide.
That means you can skip the section "Updating Statamic's GlideServer and ImageManipulator", and go straight to "Adding a watermark". Note that the "Updating assets config" section does not apply to the official update in Statamic. My photography site is now running with native watermark support. Woo!
Statamic gives easy access to a tag within Antlers to help hook in to the incredible Glide image manipulation library for image manipulations - and is such an incredibly powerful tool to use. And while Glide itself does have capabilities to handle watermarks, a quick flick of the Glide tag statamic docs shows that Statamic currently doesn’t offer any support, and a Google search shows others have asked for it.
Looking at Statamic’s docs, the attributes we can already use on the Glide tag do match what Glide is expecting, but unfortunately the instructions for watermarks are not supported. Looking through the source code, some are defined as allowable attributes, but they do not work - they’re simply ignored. This got me thinking: we're so close... what can I do to help?
Watermarking images would be such a useful feature - not just for my site rebuild, but no doubt for others. Time for a pull request to help out.
What’s the issue?
In Statamic’s code for Glide, there is an array of allowed API attributes for Glide, and this does include the majority of watermark attributes. If you try to add them to the glide tag, an image is rendered, but the watermark specs are ignored. Quite oddly, while I was playing in my testbed, I did get watermarks working with basic settings, but on a clean composer install, they stopped 🤷♂️. One API attribute absent, markAlpha, actually throws an exception too.
Basically, under the hood, Statamic’s Glide setup allows the majority of watermark API calls, but the Glide server set up by Statamic is not actually able to be configured to use them. So you can include them - but they won’t do anything.
The pull request I've suggested:
Adds markAlpha to the list of allowed API attributes
Updates Statamic’s Glide server to have watermark configuration
Adds a new config option for the Glide server watermark config
Commentary on the PR does show that my approach is a bit opinionated (and a tad messy) in how to achieve it - but it does work too. For the Marty Friedel Photography website, I used the Glide tag approach, but just got Laravel to override Statamic's GlideServer and ImageManipulator.
Updating Statamic's GlideServer and ImageManipulator
So let’s go code diving here. Looking through Statamic’s GlideServiceProvider, we can see that the singleton pattern is used to define a single GlideServer for the entire system.
Here’s the first thing we need to do. Glide requires we set a path to the watermarks filesystem using the watermarks attribute in the configuration. This is what is missing in Statamic’s GlideServer implementation.
Rather than edit code in the vendor folder (because we all realise how moronic that is, right?), we can define a new singleton for our own GlideServer within our App folder - I called mine GlideServerWatermarks just to keep it really separate.
Essentially this is a copy of the GlideServer itself, but just adding the watermarks attribute.
1static::$server = ServerFactory::create([2 'source' => base_path(), // this gets overriden on the fly by the image generator3 'cache' => static::cachePath(),4 'response' => new LaravelResponseFactory(app('request')),5 'driver' => Config::get('statamic.assets.image_manipulation.driver'),6 'cache_with_file_extensions' => true,7 'presets' => Image::manipulationPresets(),8 'watermarks' => public_path(),9]);Within your AppServiceProvider, we can re-define our singleton for the Server:
1$this->app->singleton(\League\Glide\Server::class, function () {2 return \App\Imaging\GlideServerWatermarks::create();3});This means that Laravel will use my GlideServer instead of Statamic’s - and that the Glide library will now know about my watermarks path.
The second override is binding Statamic’s ImageManipulator contract to use my class with watermark attributes instead of Statamic’s.
1$this->app->bind(\Statamic\Contracts\Imaging\ImageManipulator::class, function () {2 return new \App\Imaging\GlideImageManipulatorWatermarks(3 $this->app->make(\Statamic\Contracts\Imaging\UrlBuilder::class)4 );5});My GlideImageManipulatorWatermarks implementation is a simple extension of Statamic’s GlideImageManipulator class, with some core updates:
Adding the watermark attributes to the $api, plus a whole heap of supporting attributes for positioning:
1private $api = [2 'or', 'crop', 'w', 'h', 'fit', 'dpr', 'bri', 'con', 'gam', 'sharp', 'blur', 'pixel', 'filt',3 'mark', 'markalpha', 'markw', 'markx', 'marky', 'markpad', 'markpos', 'bg', 'border', 'q', 'fm', 'p',4];Replicating the setParam function as is, because of the private $api status.
1public function setParam($param, $value)2{3 // Error out when given an unknown parameter.4 if (!in_array($param, $this->api)) {5 throw new Exception("Glide URL parameter [$param] does not exist.");6 }7 $this->params[$param] = $value;8}Right, with me so far? Happy to chat if you wanted too - reach out to me with any queries here.
While this approach is very app-specific and manual, it is essentially keeping core Statamic functionality in place, but just overriding what Laravel uses when requests are made. It means we can still update our app through Composer, and not lose changes, but just take care to test after each version update just in case Statamic added something new or useful to one the GlideServer or ImageManipulator.
I will just say though, in building www.martyfriedelphotography.com.au I can see just how lengthy your Glide params can get - especially with paths for the watermark - but the PR did include a config option to pre-set that. More than happy to discuss this further with the Statamic team, just saying.
Adding a watermark
After overriding Statamic's GlideServer and ImageManipulator, we're ready to go.
You just need to use the mark attribute, and set its value to be the path to an image asset. Add the mark attribute to your glide tag, and hoorah, watermark!
1<img src="{{ glide:image mark="/assets/watermarks/watermark.png" }}">

Just to help keep code samples easier to read, the alt attribute has been dropped - just remember to have a quality alt attribute for all of your images.
Why use Glide for adding a watermark?
Sure, you could prepare your assets with a watermark ready to go. But you need to do that for every asset. And if you’re a stickler for consistency, you’ll want it to be in the exact same location and scale each time.
Let’s say you have 100 images.
What if you have a new brand mark and need to re-do them? That’s re-processing 100 images.
But using the mark attribute in your Glide tag means you can simply update your watermark image, clear your image cache, and re-render your images. And hoorah, all done. Easy!
Another more interesting benefit is when dealing with responsive images. If you make your watermark be small in one corner on your large image, how small and illegible will that be on smaller devices?
By using Glide for adding your watermark, you can perform multiple manipulation for different image size renders, meaning that you can adjust the size and placement of your watermark (or even a different mark altogether) for different sized images.
And while we’re at it, we can still use Glide for our 2x images and webp too. We can do so much with a single Glide tag - so powerful! Harness it!
Updating assets config
Hold up...
This section only relates to the approach taken in the Pull Request I made - as of publishing, this is not a real configuration option in Statamic's core.
If you're playing along at home, you may like to change the public_path in your GlideServer singleton override to be a shortcut to your path - I'll leave that up to you though.
In my PR, I added a new config option in the config/statamic/assets.php file - in the image_manipulation key, I suggested a watermarks_path be added. In the PR, it is passed to Statamic’s Glide server and serves as the root for the mark attribute. By default, this is set to the public path - and you can provide a path to any asset from there. But setting this to the actual folder location of your watermark asset makes your mark attribute a little cleaner.
In the overrides above, given it is app-specific, I just used the public path as that was good enough for me.
Anyhoo, let’s say your watermark image’s path is, from your public folder:
/assets/watermarks/marty-friedel-logo.png
Every time you use the mark attribute you need to specify that path - and with longer paths, your Glide tags may start to get harder to read.
To help shortcut your mark attribute, update your watermarks_path to be the watermarks folder
1'watermarks_path' => public_path('assets/watermarks')Now the mark attribute can be shortened to simply the asset name:
1<img src="{{ glide:image mark="watermark.png" }}">Fun fact: if you like to use presets for your Glide manipulations, the watermark API options work in your usual Statamic Glide presets too.
This does work for the manual overrides to Laravel mentioned earlier.
Essentially what the PR suggests is to enable watermark configuration under the hood in Statamic, and provide a handy way to shorten the watermark path, so all you need to do is pass base watermark configuration to the Glide tag.
Manipulating the watermark
So now that you have an image with a watermark being rendered, you may also want it consistently placed and sized. This is where additional watermark API options can help.
We are able to adjust:
Width and height
Fit (crop/stretch behaviour)
Offset (both X and Y)
Padding
Position
Alpha
Check out the Glide documentation for more information on each option.
Basically we can pass any valid option through in our Glide tag and start manipulating how the watermark appears.
Think back to the earlier image example - I don’t want it sitting flush on the bottom right, nor do I want it to be quite so big or bold.
So let’s move it first. Using markpad we can shift the watermark away from the edge of the image by passing the number of pixels padding to add around the watermark:
1<img src="{{ glide:image mark="watermark.png" markpad="100" }}">
Note that markpad is a simple shortcut for applying the same value to both markx and marky - if you want to have different X and Y values, you can use those instead.
It’s still too big, and I want it on the bottom left corner instead. Let’s move it first: the markpos option allows us to specify different options, such as bottom-left to place it in the bottom left corner:
1<img src="{{ glide:image mark="watermark.png" markpad="100" markpos="bottom-left" }}">
Just to show how easy it is too - if we use center we can place it smack bang in the middle
1<img src="{{ glide:image mark="watermark.png" markpad="100" markpos="center" }}">
OK, so back to bottom left, but it’s too big. We can use width and/or height to control the size of the watermark.
1<img src="{{ glide:image mark="watermark.png" markpad="100" markpos="bottom-left" markw="20w" }}">
You’ll see here that the markw has actually passed a relative dimension, not an integer. In this example, the watermark will be 20% of the width of the source image. You can pass either the number of pixels or a relative dimension to the width, height, markx, marky and markpad options.
The markfit attribute can be used here too - but by default, its contain default means there’ll be no cropping or altering of the aspect ratio - so this is handy. But explore the documentation if you want or need to do something else.
One final piece - I want my watermark to be semi-transparent. Glide’s markalpha helps us here, accepting a value between 0 and 100.
1<img src="{{ glide:image mark="watermark.png" markpad="100" markpos="bottom-left" markw="20w" markalpha="40" }}">
We are now able to have watermarks placed consistently across our images, such as these too:

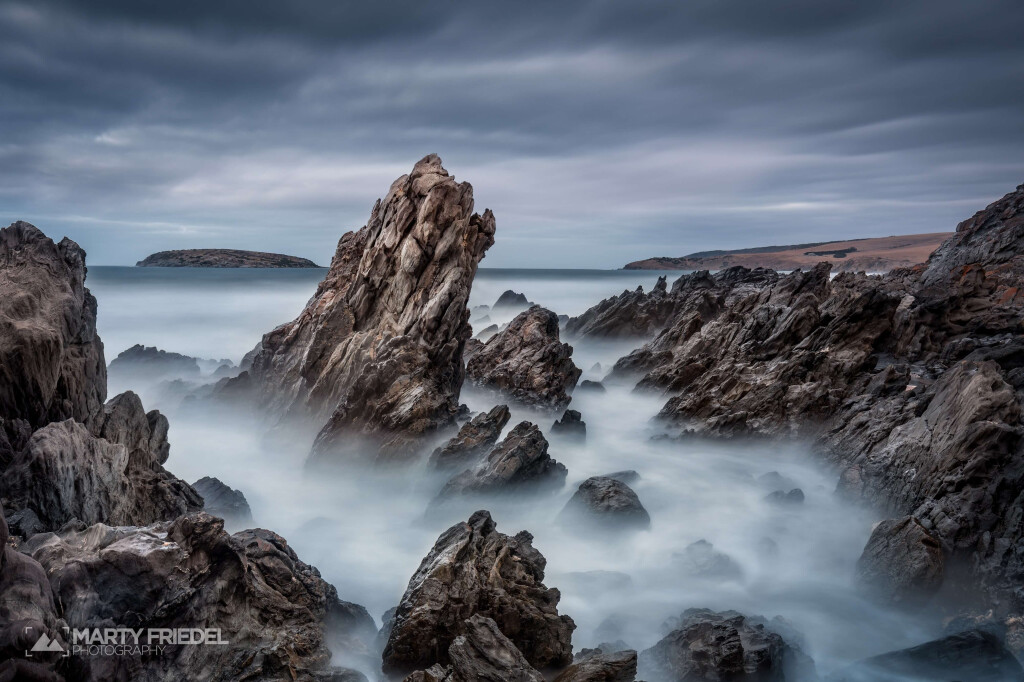
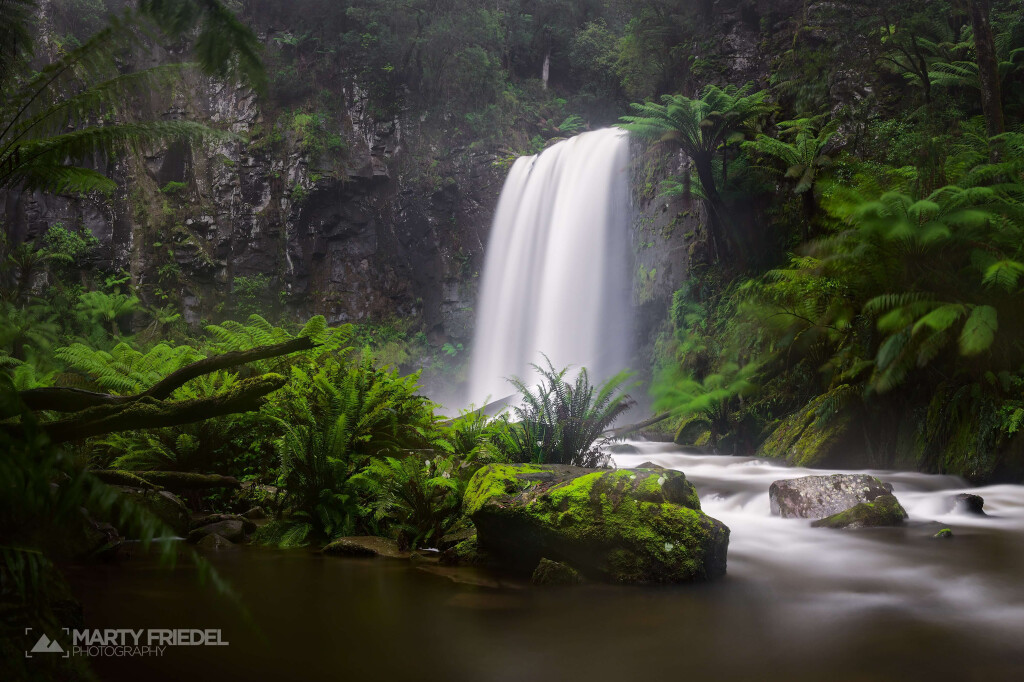
All of these have been rendered using the above glide configuration, and have resulted in consistently sized and placed watermarks.
Protecting your assets
Part of the reason for using watermarks is to add your stamp to your (or your client’s) images to help add credit or potentially prevent others from pinching your images and using them as their own.
Any asset you store within your public folder is accessible via the web (unless you do some server config to prevent folder access - but that’s another thing). This means that even though your images are served through the Glide tag with watermarks, viewing the source may give enough clues to the actual original asset location - and therefore the un-watermarked image.
Given that Glide can perform resizing and compression, it’s nice to keep your original asset as a higher quality image - and let Glide to the manipulations and saving for the web. But if your assets are accessible without your watermark, you’ve missed the point.
Rather than storing your original assets within your public folder, re-configure your disk to store to a non-web-accessible folder, such as a folder within the storage_path.
Glide will still read images from your storage path, even if they’re not directly accessible via a web browser. It’s Glide’s output that will be served, leaving your high quality original assets not accessible.
While this is a bit of a manual approach to extending Statamic - mainly as I was really wanting to get my site live - it does show that the Glide tag can support the watermark capabilities of the Glide library.
I do love that I can just upload my images now, and know that my site will take care of watermarking them for me with consistent sizing and placement.