Making the most of templates in TinyMCE
This article is over 12 months old, and may be out of date or no longer relevant.
But you're here anyway, so give it a read see if it still applies to you.
This article was written for and originally appeared on Blueprint by Tiny.
When writing content, templates can save users a lot of time, especially when they’re entering a lot of the same content over and over.
Your templates can include any HTML that gets reused, and perhaps even includes some complicated markup - like have styled and formatted data tables for your users to populate without having to worry about the HTML. Or perhaps your users need to write letter responses, and your organisation has a number of pre-set responses. Feeding these in to the templates plugin can really help your users be more productive.
The templates plugin is part of the TinyMCE core suite of plugins, and is available to all TinyMCE users - including those using a self-hosted setup, those using the cloud version, and customers who use the free Community version or the premium Essential and Professional options.
If you’ve never explored what the templates plugin can do, it’s well worth your time to consider how templates could be implemented within your setup to help improve consistency with your author’s content (as well as improve their authoring experience).
In this article, we’ll work through some specific use cases, detailing how to configure TinyMCE in each scenario.
Basic configuration
In order to get started with templates, as with any plugin for TinyMCE, you need to update your configuration to reference the particular plugin:
1tinymce.init({2 /* ... */3 plugins: "template"4});The templates plugin can be triggered from either a menu item or toolbar button. Depending on your desired setup, you may need to update one (or both) of the configurations for menubars and toolbars to give your users access to your defined templates.
1tinymce.init({2 /* ... */3 menubar: "insert",4 toolbar: "template"5});Don’t forget too to include your other configuration for plugins, menubars and toolbars - these examples are just showing how to quickly get started with just this plugin.
Where do templates come from?
When you use the templates plugin, you also have a new configuration option called “templates” that accepts either an array or a string. This is where your templates are defined.
If you provide it with an array, this is a simple JavaScript array and expects a list of template content objects. Each object contains a:
title
description
content or url
If you provide “content”, this is a simple string that contains the HTML content of the template.
If you provide “url”, this is a relative path to the file containing the HTML.
1tinymce.init({2 /* ... */3 templates: [4 {title: 'Some title 1', description: 'Some desc 1', content: '<p>My content</p>'},5 {title: 'Some title 2', description: 'Some desc 2', url: 'templates/development.html'}6 ]7});Here's an example on CodePen:
Separating template definitions from TinyMCE config
But the exciting way to add your templates is if you simply pass “templates” a string which is a URL that returns valid JSON - and that is simply the same array of objects with the title, description and content or url properties.
This URL simply needs to be in the expected JSON format - it could be a static JSON file, but it could also be a dynamic script that produces the JSON on the fly from your CMS - and is written in whatever flavour language you need, so long as it produces the right JSON output.
Why is this exciting?
It comes down to maintainability.
If you hard-code your templates array in your TinyMCE config, any time you need to add more (or even tweak a name or description), you need to update your config and deploy the updates. Just adding a new template really shouldn’t need core code-level changes like this.
On the other hand, creating an external source for your templates - be that the static JSON or dynamic script - your templates, their titles, descriptions and content, are all separated from your core TinyMCE configuration.
Your templates could be coming from your content management system (or even a headless CMS if you’re heading down that path), or just a folder of files that can be read and iterated on the fly.
Whichever way you source your templates, your TinyMCE configuration doesn’t need to change just because you need to add a new template or change an existing one - using the string URL option gives you the greatest flexibility in the longer term.
How to make your own templates
Templates are not scary - they’re just HTML.
It could be something simple like the markup for a button with a specific icon in place, or perhaps a more complicated table that is ready for your users to start inputting data. Or perhaps you have commonly-used letters or notes that need to be easily reused.
Let’s say you have a button that needs a specific number of elements to look right with your CSS:
1<button class="button">2 <span class="icon">3 <i class="fas fa-check" aria-hidden="true"></i>4 </span>5 <span>OK</span>6</button>As a web developer, you don’t see anything too scary - but trying to get a content author, who may not be versed in HTML code, to create this markup is rather complicated and has so much room for error.
To get around this, you can create a “button.html” template file, with just this markup in it, and then add it to your “templates” array:
1tinymce.init({ 2 /* ... */ 3 templates: [ 4 { 5 title: 'OK Button', 6 description: 'A pre-built OK button with tick icon', 7 url: 'button.html' 8 } 9 ]10});And now your content authors are able to easily insert an OK button into their content without actually knowing any of the markup that goes into making it look the way it does.
But let’s also consider another use case - pre-written response letters. You know the type: “we regret to inform you…” type things.

OK, OK, these letters can be positive things too.
If your users need to generate letter after letter, do you want them having to write the letter themselves? Or force them to copy-and-paste from another document or app? Not ideal - just think of the typos and spelling or grammatical errors that could happen! This is a great use case for using templates within TinyMCE.
You can create your letters within your content library system (and have this feed in to your JSON templates array) and give your authors the ability to select a pre-written, pre-approved letter that they can then tweak as needed case-by-case, rather than being written from scratch.
Whether your template is just a button, a data table or a pre-written letter, the foundation is the same: it’s just HTML. Nothing to be afraid of.
Do your users know what day it is?
With so many of us working from home at the moment, the concept of what day of the week it is (let alone what the actual date is) is becoming rather vague. And do you really want to leave the responsibility of entering the correct date to your app’s users?
Thankfully, TinyMCE makes it easy to insert the date in to your templates when they’re used - and can either be for the date it is created, or even the date the content is modified.
These two options are very similar, but just note that the “created” date is set when the template is used, whereas the “modified” date is set to now when used, but also updated on future edits. We’ll just look at the “created” date here.
To get started, we need to define the class that should have the date inserted.
For example, our template might be a letter starting with the date before the “To” part of our letter:
1<p class="created-date"></p>2<p>To whom it may concern,</p>We need to update our TinyMCE configuration to include the class where we want the created date to appear, as well as the date format we want to use.
1tinymce.init({2 /* ... */3 template_cdate_classes: "created-date",4 template_cdate_format: "%A %d %B %Y"5});When we insert this template in to TinyMCE, the created date will be inserted in to that first “created-date” paragraph, with our set format:
1<p class="created-date">Tuesday 23 June 2020</p>2<p>To whom it may concern,</p>When defining your format, use the tokens defined by the template plugin. Don’t forget to refer to the documentation for full details on created and modified date configuration options.
Making your templates more personal
Let’s say you’re managing different letters that you need your users to generate and complete, each on a case-by-case basis.
If you were to write a letter, you would start with a typical greeting - dear, to, hello - and it is always nice to include the recipient's name for that personal touch.
You could ask your users to type the name in - but if your implementation is part of a system which already knows who the letter is for - for example resolving a ticket or case - we can use the “template_replace_values” configuration option to do just that.
Now this does require a more advanced approach to your TinyMCE configuration as you need to have these options able to be configured at runtime case-by-case. After all, you don’t want to hard code just anyone’s name in your configuration.
Just for fun, let’s imagine you are responding to competition entries for which cat is the winner of a specific category (such as Fluffiest, Most Handsome or Cutest), and you know the owner’s first name, their pet’s name and the category.
You might have the letter template set up like:
1<p>Congratulations {$owner_name}!</p>2<p>Our panel have agreed that {$cat_name} is definitely the {$category} cat out there.</p>3<p>We loved seeing your photo, and will be sharing on our social media channels.</p>4<p>Keep {$cat_name} being the {$category} cat - we know you will!</p>5<p>Regards,<br>6The 2020 Best Cat Voting Panel</p>We can update our TinyMCE configuration to include reference to those variables we have included in our template:
1tinymce.init({ 2 /* ... */ 3 templates: [ 4 { 5 title: 'Cat Competition Response Letter', 6 description: '2020 response to the Cat Competition', 7 url: 'templates/2020-winners.html' 8 } 9 ],10 template_replace_values: {11 'owner_name': 'Marty',12 'cat_name': 'Toby',13 'category': 'Most Handsome'14 }15}Here you can see the object of variables that match those used in the letter template. When we select the template and insert it into TinyMCE, those variables will be automagically replaced.
The consideration you need to be aware of here is how those variables will make their way to your TinyMCE configuration. You could perhaps have your server-side code generate your TinyMCE init code (and inject on the server render), or perhaps have these injected as variables via JavaScript from elsewhere in your app. There are different ways you could approach this, and it does depend on your application and architecture as to what works best for your project.
Oh, and for the record, my cats win the “Most Handsome” category, hands down. Just saying.
Using templates as a replacement
So far we’ve really been looking at how templates can insert pre-set content into your editor. But did you know that TinyMCE can also do a merge and replace on the fly?
Let’s go back to our Button example above, and make a minor tweak: we will add the “selcontent” class to the label part of the button.
1<button class="button">2 <span class="icon">3 <i class="fas fa-check" aria-hidden="true"></i>4 </span>5 <span class="selcontent">OK</span>6</button>We also need to update our TinyMCE configuration to specifically look for this class - and this means you could use a class name that suits your coding style too:
1tinymce.init({2 /* ... */3 template_selected_content_classes: "content-replacement"4});We are setting up our button to be an OK button… or a “Save” button… or a “Complete” button. And using the “selcontent” class makes it easy for our authors to adjust the label of the button with ease.
This may need to be explained to your authors - but when they understand how it works, it can do wonders.
Imagine your users have written their content, including what they want the button label to be. They just need to select the “label”, and insert the template. Their selected label text will replace the placeholder text in the template.
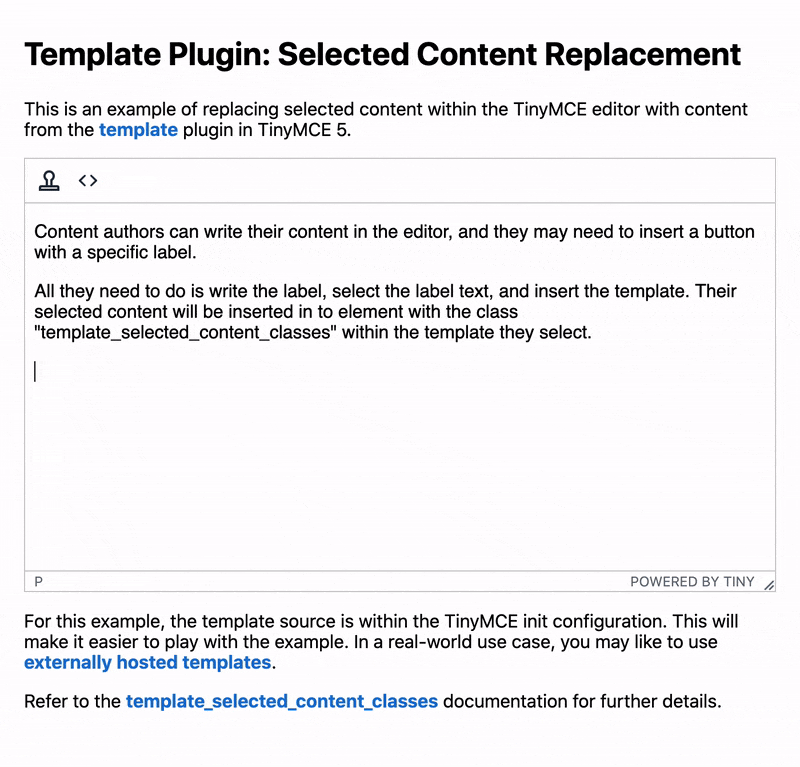
Because we added the “selcontent” class to the label part of the button, TinyMCE will pick up the currently selected content in the editor, and insert that in to our template as we go.
And suddenly our simple Button can easily have its label changed without looking at the source code at all.
Try it here:
Advanced templates
Just a quick note on templates within a bigger system - and this may not apply to you, but if your document management system generates your template code with unneeded code (in the scope of TinyMCE) such as the <head> and <body> tags, you can apply the “mceTmpl” class to the part of your document that is actually the part that TinyMCE should use as the template.
This can be useful if you want the template preview that TinyMCE users see to show a finished product - such as a letter with the correct letterhead and formatting - but you don’t want all of that markup within the TinyMCE editor itself.
Consider this template:
1<body> 2<p>This appears in the template preview, but will not be inserted in to TinyMCE.</p> 3<div class="mceTmpl"> 4 <p>This is the actual template content that will be inserted.</p> 5 <ul> 6 <li>And can include nested elements</li> 7 <li>So your templates can still include your complex HTML</li> 8 </ul> 9</div>10</body>It includes a <body> and some content that we don’t want to include in TinyMCE. The <div> with the “mceTmpl” class is telling TinyMCE that the content within is what we want to insert in to TinyMCE. When we select this template, TinyMCE inserts:
1<p>This is the actual template content that will be inserted.</p>2<ul>3 <li>And can include nested elements</li>4 <li>So your templates can still include your complex HTML</li>5</ul>If the end product of your content requires advanced formatting, you can utilise templates and the mceTmpl class to deliver a complete WYSIWYG preview of the finished product, but still only insert the content you want your authors to edit.
Don’t forget your content_css
One last thing… don’t forget about your content_css TinyMCE configuration option too - this will help your content (and your templates) look the way you intend them to appear in your finished product. This dramatically improves the user experience for your authors knowing that they are getting a true WYSIWYG representation.
Templates are such a useful way to help your content authors easily reuse specifically written, formatted or structured content - from buttons to tables to entire letters - and can even populate your templates from an external system for making template management incredibly easy. Have a think about what content your users are authoring, what areas are often replicated, and consider how templates could be implemented to help streamline and improve your author’s experience.